A Quick Tour of File-Works
Welcome! This Quick Tour will serve two purposes...
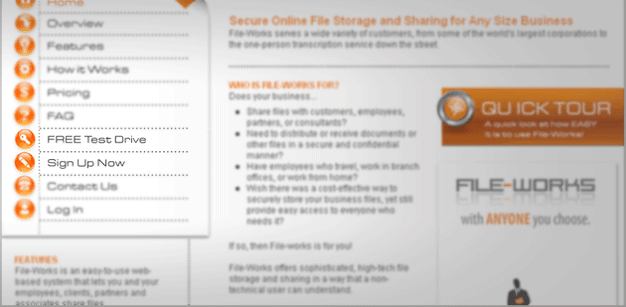
It will show you how to get started with your FREE test drive (no credit card required), and it will show you how easy it is to set up your company's account and start using it. The setup process is the same for a Test Drive account as it is for a full File-Works account. To set up a Test Drive account, you would click on the "FREE Test Drive" link on the menu. To set up a full File-Works account, you would click on "Sign Up Now". The registration process is different, but when you get to the account's Administration Page, things are pretty much the same.
On the "FREE Test Drive" page, enter just a bit of information...
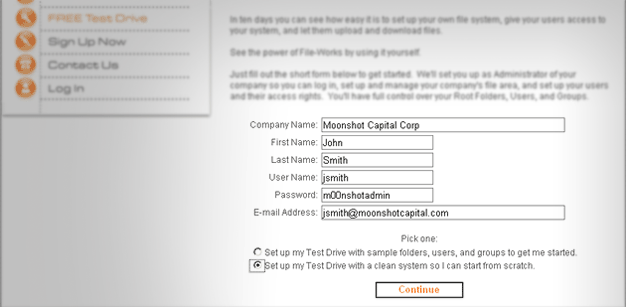
Your name, your Email address, your company name, and the login username and password that you would like to use are all we need to get you started. You can decide whether or not you want some sample folders and users set up. (These are easy to get rid of later if you change your mind.) For our purposes, we'll ask for a "clean system" so we can set some things up ourselves and show you how. Click "Continue" when you're ready to proceed.
Click "Log In" and you'll be taken to your Administration Page.
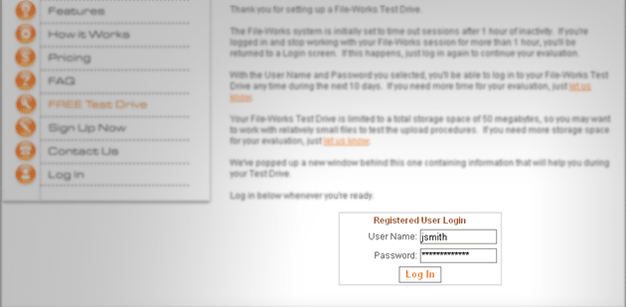
Your username and password are already filled in for you.
A look at your account's Administration Page...
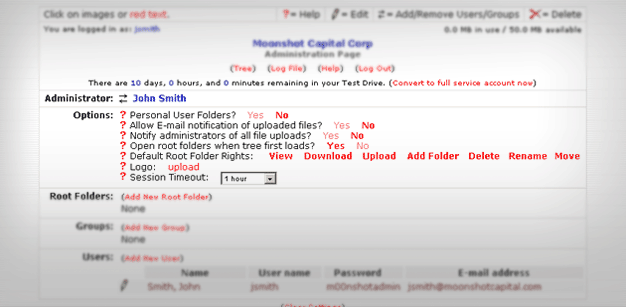
Your name will appear as your company's Administrator. Administrators have full rights to do anything that can be done with their company's File-Works account, including the designation of other users as Administrators. A number of account options are listed.
Find out about an option.
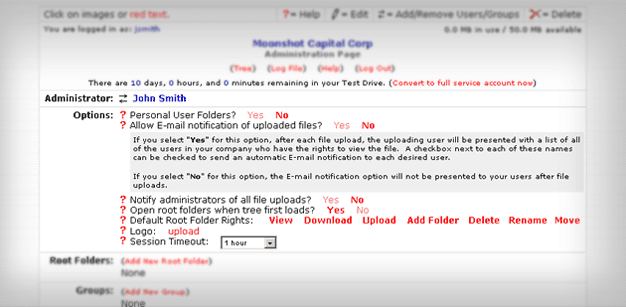
To find out more about any of the options, click the red question mark to the left of the one you're interested in to display a description of the option.
Setting up Root Folders
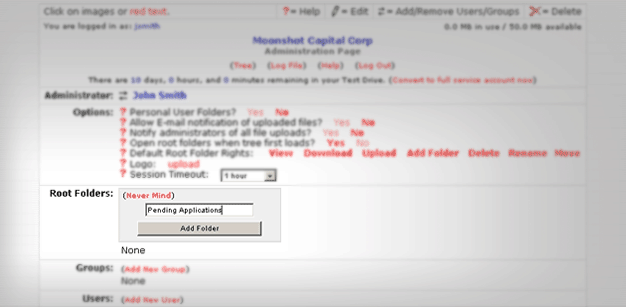
Think of a Root Folder as a drawer in a file cabinet. You'll be able to control which Root Folders each of your users can see, and you'll be able to control what they can do inside each of the Root Folders they can see. Click "Add New Root Folder" and enter the name of your new folder. Then click "Add Folder".
Two for the price of one...
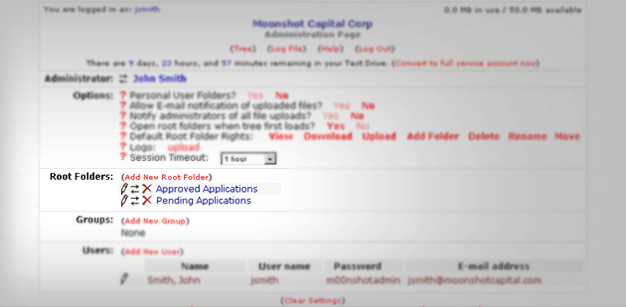
We've set up a second root folder so we can show you a few things. Actually, you can set up as many Root Folders as you like. There's no limit.
Now let's set up a user.

Click "Add New User" and enter the information requested. When it's all there, click "Add User".
Rinse and repeat...

We've added a second user (again, so we can show you some things). In our example, Susan Clark is one of our employees and Richard Jones is a partner or associate who is outside of our company. We will be giving Susan quite a lot of access and rights, but Richard will be quite limited in what he will be able to do. You can set up as many users as you like, and there is no extra charge per user.
Setting up user access to Root Folders
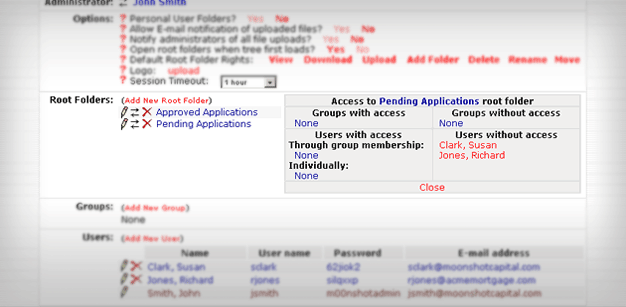
Here's where the magic starts. Click the double-arrow symbol to the left of one of the Root Folder names. A list of all (both) of our users will appear. Names on the right side are users who don't have access to this Root Folder; names on the left side are users who do. To move a name from one side to the other, click on it. We'll click on both names because we want to give both of them access to this particular Root Folder.
Access has been granted...
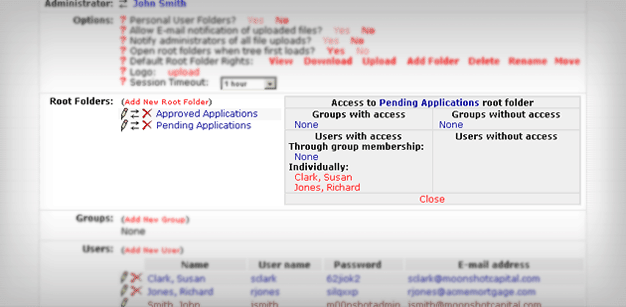
After clicking on both user's names on the right side of the "Access" box, here's what we see. When either of these users logs in, this Root Folder will be visible.
The other Root Folder is only for use by our employees.
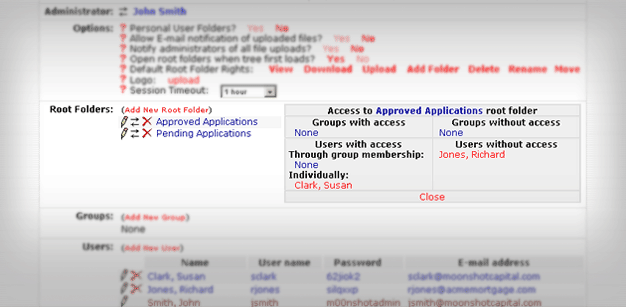
We only want Susan (and maybe some of our other employees later) to have access to the other Root Folder ("Approved Applications") We move Susan's name to the left side of the "Access" box, but Richard stays put in the "Users without access" area. When Susan logs in, she will see this folder, but when Richard logs in, he won't. In fact, Richard won't even know that it exists.
Setting user rights within Root Folders...
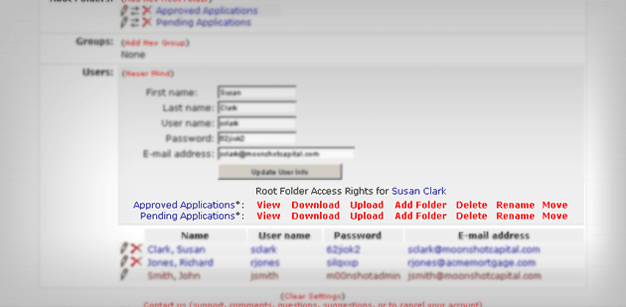
Click the "pencil" icon to the left of Susan's name in the user list, and take a look at the lines under the "Update" button. There will be a line for each of the Root Folders that the user has access to, and there are several options on each line. Options displayed in bold type are enabled; in normal type they are disabled. We're going to leave all of Susan's options enabled, because we want her to have full control over everything that goes on in these Root Folders.
User rights for Richard...
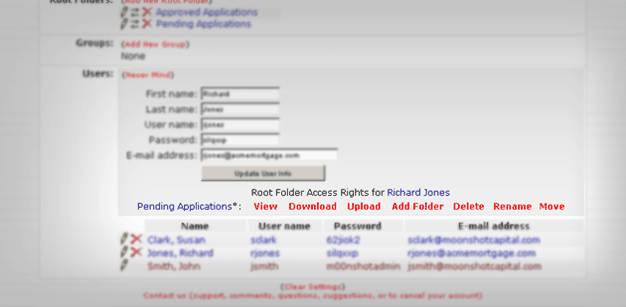
Richard, however, is not our employee. He is providing information (files) to us, but all we really want him to be able to do is to upload files. We don't want him to be able to delete files, over-write files, move files, or set up sub-folders in this Root Folder. So we'll click on "Download" and the last four options to disable them for Richard in this Root Folder.
View and Download only...
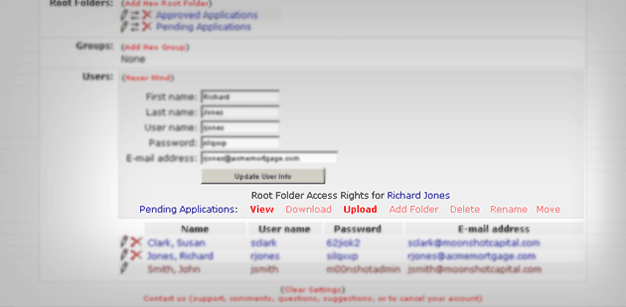
We're only allowing Richard to look at the files in this Root Folder, and to upload files into it.
When Richard logs in...
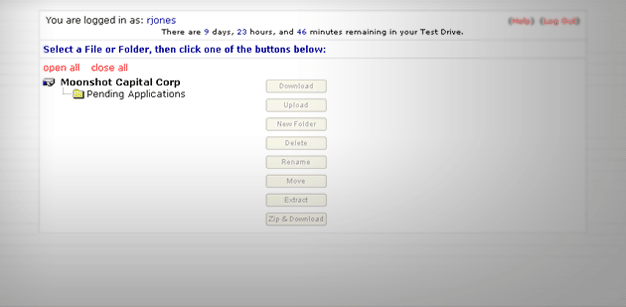
...this is what he sees. Remember, we only gave him access to the one Root Folder that we want him to upload files into.
View and Upload only...
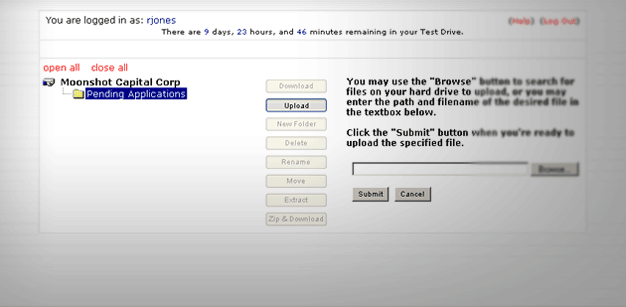
When Richard clicks on the "Pending Applications" root folder, only the Upload button becomes active, because we've only given him View and Upload rights to this folder. (If there were files in the folder, he could see their names, but he couldn't download them or delete them or mess with them in any way.) In the screenshot above, Richard has clicked on a folder and then clicked the "Upload" button. The File Upload dialog is waiting for him to select a file to upload.
Uploading a File
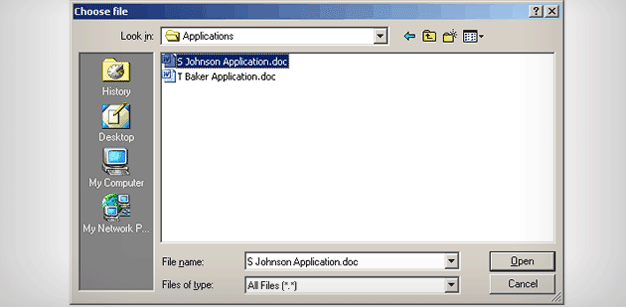
Clicking the "Browse" button brings up the standard Windows "Choose file" dialog box so you can locate and select the file to be uploaded. (This will look different with different versions of Windows.)
Submitting a File Upload
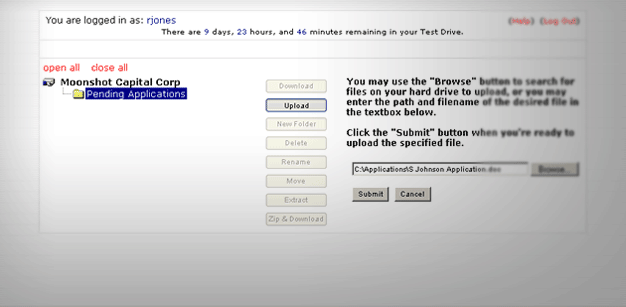
After the file has been selected, its path and filename will appear in the textbox. Just click "Submit" to upload the file into the folder you have selected.
After the File Upload
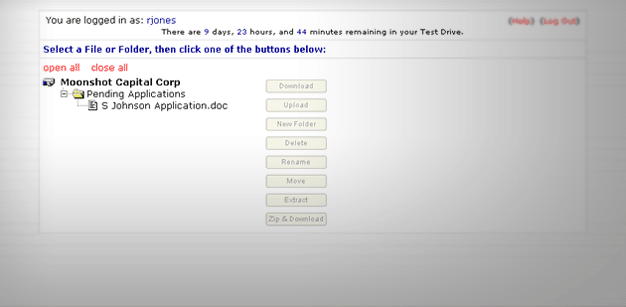
After the upload completes, it will appear inside the folder to anyone who has "View" rights to the folder. Folders can be created inside Root Folders, but everything that goes on inside a Root Folder is controlled by the access rights you establish to it on your Administration page.
Poor Richard...
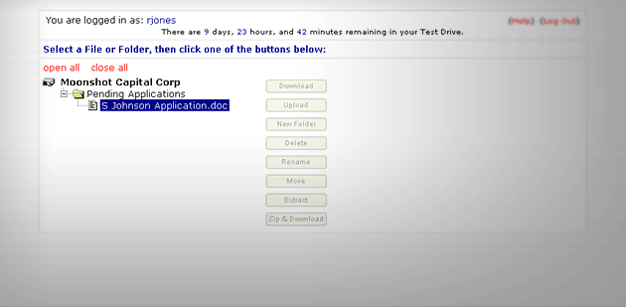
If Richard clicks on the file name of the file he just uploaded, NONE of the buttons become active, which is as it should be.
Susan's view of File-Works
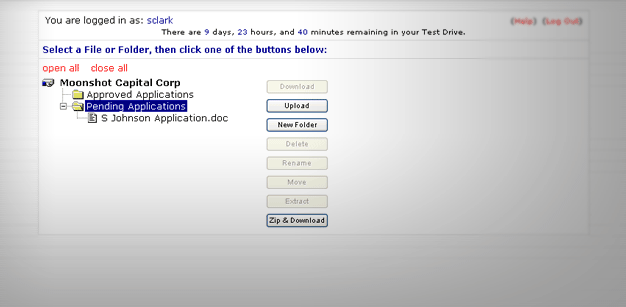
When Susan logs in, her view of File-Works is quite different than Richard's was. She sees two folders instead of just the one, and when she clicks on a folder, three of the buttons become active. She has been granted full rights to the folder, and "Upload", "New Folder" and "Zip & Download" encompass everything that can be done with a folder.
Susan's file rights...
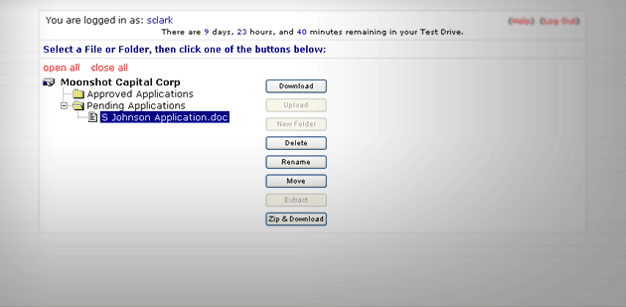
When Susan clicks on a file, five buttons become active. Full rights to the folder mean she can "Download", "Delete", "Rename", "Move", and "Zip & Download" files.
All done!
